
Pipedreams 🙂
While I should be packing for our upcoming trip, I am still obsessively drawing DIY solo camper van plans!
I promise to buckle down and live in the real world tomorrow! 🙂

Pipedreams 🙂
While I should be packing for our upcoming trip, I am still obsessively drawing DIY solo camper van plans!
I promise to buckle down and live in the real world tomorrow! 🙂

Posted by tinycamper on November 3, 2013
https://tinycamper.wordpress.com/2013/11/03/while-i-should-be-packing/
(Casita wiring schematic removed by request.)
Sometimes projects overwhelm me because I have no prior knowledge or experience to draw on.
Installation of the Fantastic Fan is one of those projects.
I suppose my fear of working with anything electrical goes back to the dire warnings of electrical shock and electrocution that my mother instilled on me thoughout my growing-up years — based on a near-death experience during her teenage years.
Anyway, I understand now that if the trailer is unplugged and one cable of the battery is removed (or the breakers turned off) that I’m not going to get fried. But that’s about all I understand.
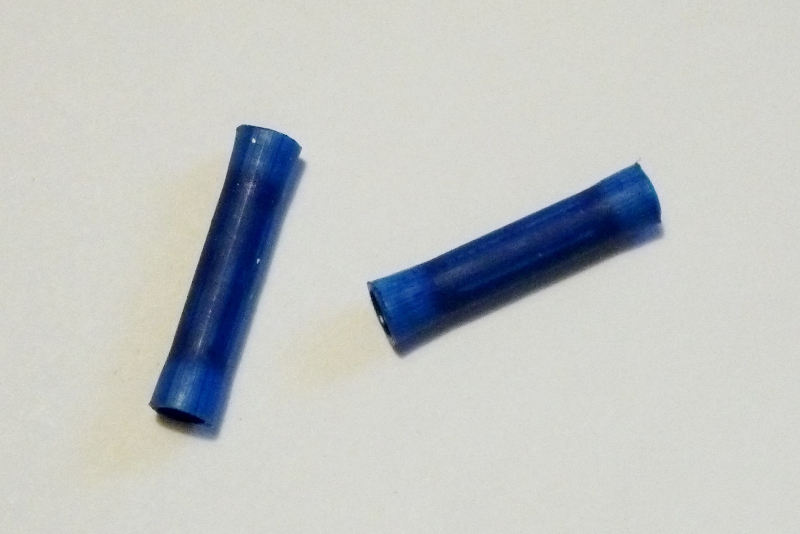
These connectors came with the Fantastic Fan
First of all, most Casitas come prewired for a Fantastic Fan. The original owner of my trailer ordered it without a roof vent at all. So there is no existing fan wiring to tie into.
I called Casita, and they said to tie into the dinette lighting. They are wonderful people, but they are also extremely busy, and my dumb questions apparently frustrated them. So all I know is that I need to tie into the dinette light wiring.

One size fits all. 🙂
I found a DC diagram for the Casita and it shows me where the wires run. I will have to lift the carpet inside the cupboards, find the wires, then glue the carpet back down later.
I am going to have to run the wires under the carpet from the cupboard to the ceiling. I have some heavy aluminum wire that I think I can create a fish tool from.
I have the wood spacer for the fan cut out. Just need to sand and finish it.
So now I am down to trying to figure out how to follow the Fantastic Fan electrical directions. They say, “Hook 12 volt power to fan.”
Two wires are attached to the fan, and the package includes two little blue connectors. I have never seen connectors like these before. So I do a web search for a tutorial. Finally I find an article that says to slide the wires in from both sides and crimp in the middle. But I don’t know if one crimp in the middle will keep the wires from vibrating apart. Would it be better to crimp each wire separately near the middle of the little blue thing? I have no clue. I’m guessing it couldn’t hurt.
Then I start thinking that if I cut the trailer wires and connect the fan that probably the lights and bathroom fan, farther down the circuit, wouldn’t work unless the Fantastic Fan was switched on. So I searched the web again and found diagrams of jumper wires that would apparently route the current around the fan if it was off.
So I did a little sketch of how I thought I needed to do a jumper wire and emailed it to a guy who has answered questions for me in the past. Although he graciously replied, he apparently was amused and his reply was so flippant that I would never dare ask him another question again. 🙂
Next I needed to decide what size connectors to use inside the cabinet. I know from experience with battery connectors that there is no way I can crimp a wire tightly enough to get it in the size connector that’s supposed to fit. I finally find some connectors that say they replace several different sizes… kind of an all-in-one solution.
Fortunately I do know how to use them because I have seen my ex connect wires with that screw on type connector.
Once I get the wires fished and figure exactly where to connect them, mounting the fan should be fairly simple — because I have used butyl tape and self-leveling caulking before, so I’m not expecting any hidden monsters to jump out and bite me there!
We have some rain on the way, so this will probably take a while!

Posted by tinycamper on March 15, 2013
https://tinycamper.wordpress.com/2013/03/15/doing-things-i-dont-know-how-to-do/
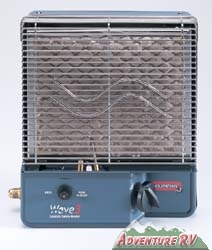
The Wave 3 Catalytic Heater
I’m having a debate with myself about whether to have our Suburban RV furnace repaired or to replace it with a Wave 3 Catalytic heater. Apparently the fan bearings have gone bad in the Suburban.
Adventurenet RV has the Wave 3 for $191.00, and Amazon has it for $202 with free shipping. Regular price is $300. If I have an RV shop install it, I will pay $300 + labor.
The two things I love about the Suburban furnace are the thermostat that I like to set to around 60 degrees when we sleep in cold weather. I also love the fact that, no matter how cold it gets, the furnace can be cranked up to keep us toasty.
What I don’t like about the furnace is that it is noisy, and it’s a battery hog. That’s a big consideration when we are camping without hookups in cold weather.

I would put the Wave 3 where the furnace is now.
I’m convinced that the Wave 3 is safe, as long as adequate ventilation is provided. And I love the feel of the soft heat it provides. I believe that, unless we were in extraordinary cold for our area, that the Wave 3 would keep us warm enough. And we could run it non-stop without it draining our battery.
But I’m hesitating, and I’m hoping that some of my readers can answer a question for me.
I’ve read that the Wave 3 must be covered when not in use, and that if dust gets into the pad, it can poison it. Replacing the pad involves sending the heater back to the company, and is expensive.
I would keep it covered when not in use, but I am very concerned about floating dog hair. Sheba sheds prodigiously. There are always light, airy balls of black dog hair floating around, no matter how often or vigorously we brush her.
And I’m afraid all that dog hair would ruin the catalytic heater.
Apparently other RVing dog owners are happy with their catalytic heaters, but maybe their dogs don’t shed as badly as Sheba does.
So…. does anyone have any person experience with dog hair and a Wave catalytic heater?
And finally, I have taken gas lines apart and reattached them before, and know how to make sure the gas doesn’t leak. I wonder if it’s feasible to attempt a Wave 3 replacement by myself, or if it really is a job that must be done by a repair shop. I could do it myself for around $250, but will probably pay someone at least $400 to install one at full retail price plus labor.
I’m looking forward to hearing your opinions!

Posted by tinycamper on January 20, 2013
https://tinycamper.wordpress.com/2013/01/20/wave-3-catalytic-heater/
